I wanted a rowing boat in the style that I remember from my childhood in England and eventually decided to build one myself. After a lot of reading and web searching I chose an Iain Oughtred design, the Acorn 15. For a description of the Acorn 15 click here.

If you would like to contact me please Click to Send me Email


Thursday 30 June 2011

Day 13 - Clamps, Knees and Scarph Joints

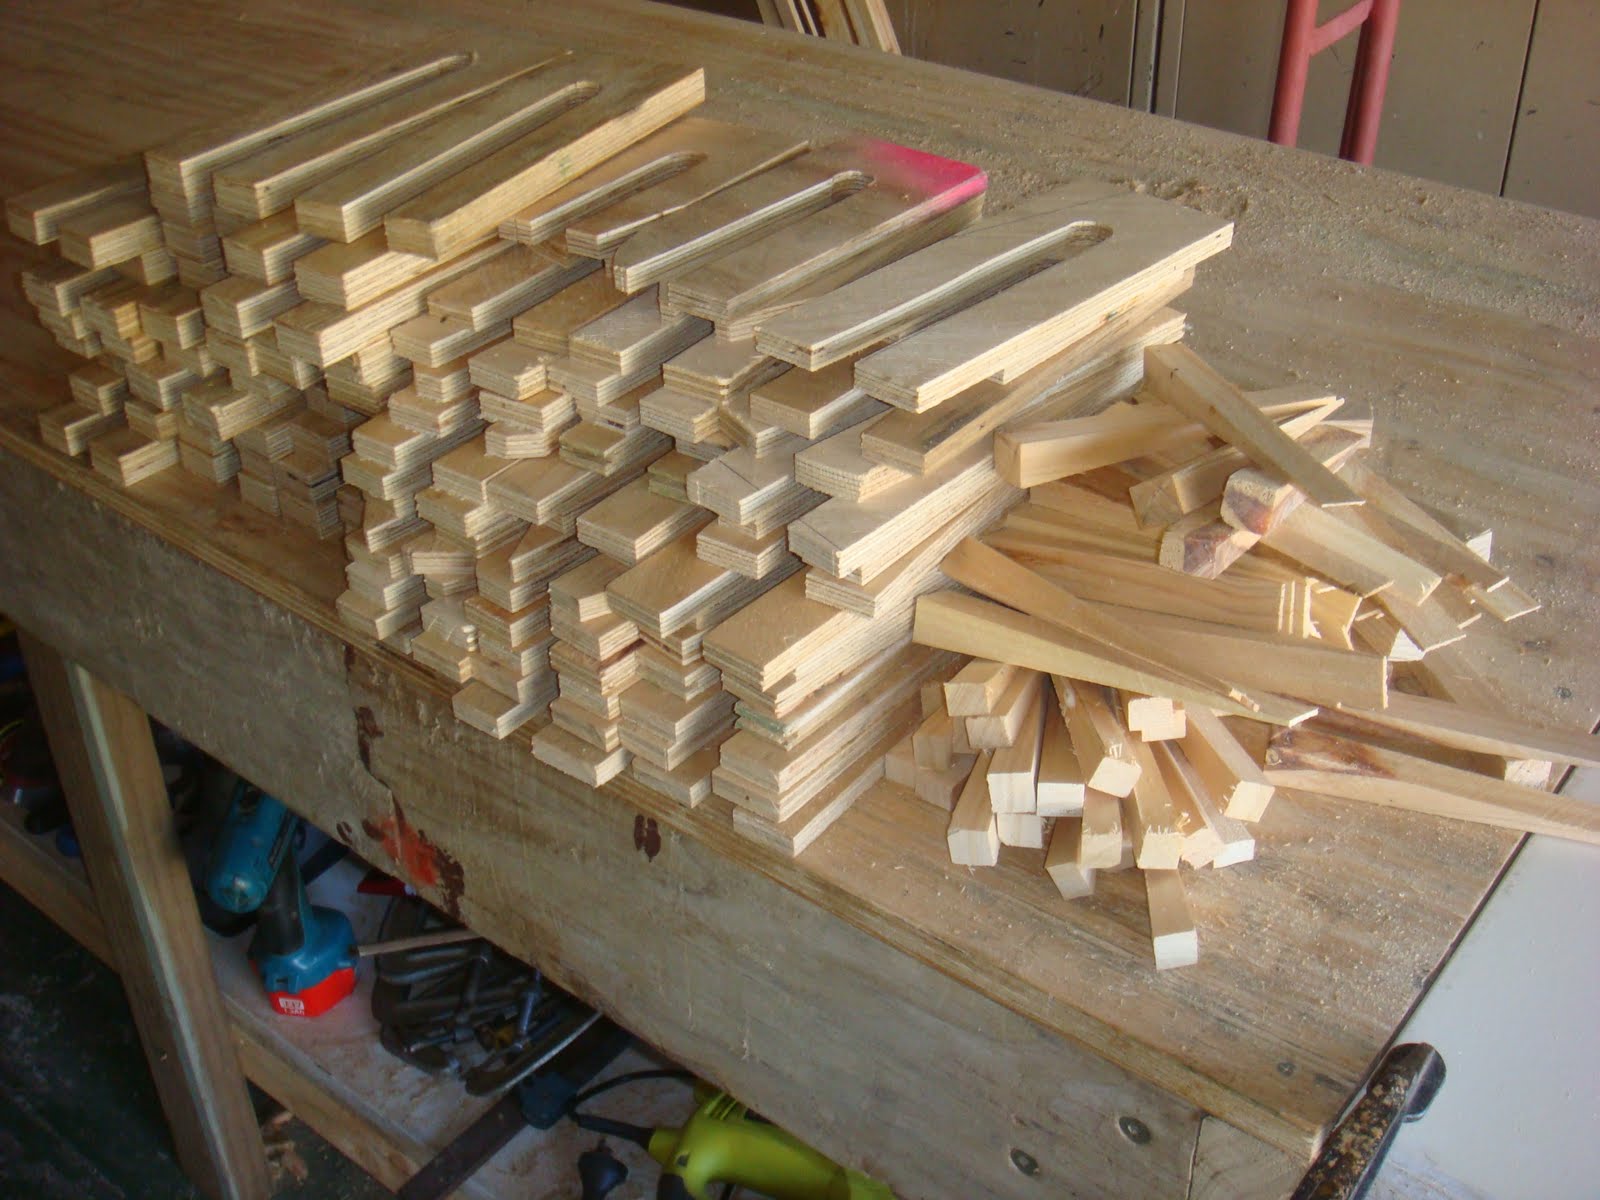
First job of the day was to cut about 70 clamps from 12.5 and 20 mm scrap plywood together with 70 wedges from other scrap timber. These will be used to clamp the edges of the planks together while the glue sets. Why 70? Roughly one clamp per 100 mm for 3.5 metres times 2 sides = 70. Here they all are:


Here is a photo showing how these clamps are used.


The boat has six laminated knees, two for each thwart and two quarter knees at the stern. The laminations are glued on formers, each slightly different. This next photo shows two of the knees on their formers. I glued up the second lot of three knees today because I will need all my clamps to glue down the garboard planks in the next couple of days.


The boat is planked with 6 mm plywood and I have chosen to scarph joint the 8 foot x 2 foot sheets of ply before cutting out the planks. The alternative is to scarph the planks after cutting the out, either on the bench or on the boat. This seems to be more difficult to me. Here are the four sheets of ply positioned on the bench ready for the scarph to be planed. The "staircase" is planed off at an angle then the top two sheets are turned over and glued to the bottom two sheets.


The glue has been applied, the joints lined up and held in place with a couple of staples. Note the newspaper in the photo below - hopefully this will stop the sheets sticking to each other, to the bench or to the clamping caul.


The caul on top of the sheets has a slight curve in its lower face so that, as the clamps bend it, a more even pressure is applied to the glue joint. The two props from the roof truss apply a little more pressure to the caul.


Wednesday 29 June 2011

Day 12 - Shape Keelson Ready For Planking

The keelson, transom and stem have been faired ready for the garboard plank to be fittted and glued in place. The photo below shows a piece of 3 mm thick MDF 200 mm wide and 4.8 metres long laid against the keelson to make a pattern for this first plank. This template is clamped and tacked in place so the outline of the garboard plank can be marked on it.

Friday 24 June 2011

Day 11 - Fit and Glue Keelson to Stem and Transom

The keelson was tapered at both ends and fitted temporarily to check that the moulds were fair. Some slight adjustments were made and the transom shaped to suit. The bend at the stern was difficult to achieve so the keelson was split horizontally on the bandsaw. This first photo shows the join at the stem with a couple of clamps holding it until the glue sets.


At the stern the sawkerf, which runs from the end past the second frame, was filled with glue. Glue was applied to the mating surfaces at the transom and the keelson pulled down into place with the Spanish windlass. The keelson and transom joint has a screw to maintain alignment until the glue sets. The clamps are holding the saw kerf closed in places where it wanted to spring open. There is a prop between the keelson and the shed roof truss to hold the keelson down over the second frame; this will be removed for planking.

Day 10 - Glue Up Blanks for Two Oars

Glued up the first two blanks for oars. It may seem premature to be starting on the oars before the boat is taking shape but this is one of the jobs that can be worked on when there is only an hour or so available. Plus, it's important that the oars are available when the boat goes in the water for the first time. Definitely don't want to be starting to make the oars then!

Day 9 - Sawing Timber and Planing to Size

Don't be fooled by the date on this post - day 9 was actually yesterday. Spent half a day spent ripping long lengths of 100 x 50 mm timber into smaller sections and then planing it to the required sizes. This is an awkward job but the alternative of paying a timber merchant to do it is expensive. Here is how I did it. It's a bit hard to see on the photo but that is a 6 metre length of timber balanced on two roller stands. The orange device is my sawbench and beyond that are an old door on trestles and my workbench lined up to catch the timber on more rollers.


Heres the result: timber dressed to size for various parts of the boat. Also a dustbin full of sawdust and shavings! The old door and trestles making my outfeed table can be seen more clearly in this photo.


Thursday 16 June 2011

Day 8 - Fit Inner Stem to Strongback

The inner stem has been cleaned up (excess epoxy removed) and screwed to the strongback and fixed to the mould at station 1 with a temporary bracket. I bevelled the front corners of the stem at 45 degrees so that there will be less material to remove when it is being faired.

Two temporary battens have been nailed to the moulds for support to keep them vertical. these will be removed or maybe lowered as the planking progresses.

Sunday 5 June 2011

Day 7 - Outer Stem and Transom

Here is the outer stem laminated on top of the inner stem over the same template as before. The backing board (with the water stain) is a piece of 25 mm thick MDF. Not my favourite material but it was in the scrap material pile so I used it. Once again I am reminded to buy more clamps!


The transom is in position. It was tricky to do this but it seems to be right. The batten gives a fair curve for the keelson and the sheer line is the correct height above the building frame so all should be well. The transom is made out of the same Oregon plank that was used for the stem laminations.


Last job for the day was to add bracing to the moulds at the stem and stern. The first two moulds at the stem have been braced and also the last two at the transom. The transom itself is also braced. The moulds in the middle will be held in place by a couple of temporary battens while the keelson and first few planks are fitted.


Thursday 2 June 2011

Day 6 - Set up the moulds on the strongback

Here are the moulds fixed to the strongback. It is beginning to look like there is a boat somewhere in my shed! The mould still need some bracing particularly at the stem and stern where there will be considerable load on them when the planks are being fitted in place.

Day 5 - Cut out the moulds

There isn't much to show for a day's work, the moulds are stacked against the wall. This was a tedious job that needed a lot of care and attention to accuracy because the shape of the finished boat depends on it. The mould shapes were transferred from the full size patterns. The pattern was laid on the sheet of ply and the mould shape pricked through. These marks were joined up using a thin batten to get a fair curve and then the mould cut out with a jigsaw. Eleven moulds times 30 minutes each equals a long days work.

Day 4 - The stem

This is the first part of the boat itself - the inner stem. The timber is Douglas Fir or Oregon from a plank that has been used on several occasions in my house painting activities. Despite this shaky start it is a good clear piece of timber with very few knots. I ripped it into 5mm slices and glued them together on a former.

As the saying goes, you can never have enough clamps!

Day 3 - The workbench

I needed a workbench in the shed anyway. I had to buy a sheet of ply for the top but the rest of it is scrap timber that was left over from the house renovations. It is the same height as the sawbench so that it makes a useful large surface for when I get to cutting the planking for the boat.

Day 2 - Build the Strongback

Here is the finished strongback. Built entirely out of scrap timber left over from renovations to my house. It is probably much heavier than necessary and I epoxied it to the floor so it definitely will not move about!

Day 1 - Make room to work

My shed was almost full, barely enough space to walk around between the piles of stuff. This photo shows the result of several hours work!